Have you heard of these nifty little snacks? While shopping the other day at my local health food store, I ran across a new product called Snapea Crisps. I figured I could eat these right out of the bag as a snack or have them on top of my salad for some extra crunch. I had some for the first time yesterday and boy are they good! Nice and crispy, just like the name says! 🙂 My Mom had them as well, she thought they were great too! Just thought I would share. 🙂
Leftovers
Today for lunch I was really wanting to make just a sandwich and have a nice salad. Well, once I opened up my fridge I realized that I better eat some of the leftovers in there or I would be tossing some food and that really angers Aaron. I don’t like wasting food either, but it is one of his major pet peeves. I respect that and try to do my best to eat the food before it goes to waste. I found a nice mix of veggies, so in place of my salad, I made a large veggie plate to go along side my Garlic Pork Roast that I shredded and put on some gluten-free bread. I had some leftover sweet potato/yam that I topped with black beans and some almond cheese (mozzerella style), some sauteed spinach and some fresh tomatoes (that I completely forgot to top with my fresh basil from the plant that I have in my kitchen window; I haven’t killed it yet!). What a yummy lunch! Here is a shot of the veggie platter:
Makes me want leftovers more often. 😉
The Cast ~ Day 3
Jon saw the orthopedic doctor/nurse practitioner on Wednesday morning. Not only did he chip/fracture the navicular bone in his hand, but at least one other bone and possibly 2 more! Poor kid! He will be in a cast for at least 4 weeks and possibly more. The good news is that he can play hockey! He is ecstatic! There a a couple of small, minor concerns. First, if he does fall and catch himself with the right hand, he may break the exposed fingers due to the placement of the cast. We are hoping that the hockey glove will prevent this. Second, he could really hurt someone else if he isn’t careful because of how hard the cast is. Fortunately the next 4 weeks are just evaluations and team placements, not scheduled games. He sees the orthopedist again on October 15th for more x-rays. If the bones are all healed, the cast comes off. This is where they will be able to see the 2 bones that they were unsure of. The 2 bones in question are on either side of his wrist and are right where a couple of growth plates are located. Apparently waiting the 4 weeks will allow them to see the changes and healing and determine if he goes back in the cast or not. Jon is still in some pain. I am not sure if it is still the actual injury or the cast causing the pain now. He says there isn’t enough padding under it and that he wants me to call the dr to take it off and put a new one on. I am thinking that he is just getting tired of the restrictions (no video games, football, etc) that have been forced upon him.
A picture of my prince in his cast (as you can see, he is beyond thrilled at being photographed for my enteratinment 😉 ):
Close up (you can see here that he has no movement of the thumb at all):
He chose red/scarlet for Ohio State. He wanted grey too, but the cast wasn’t big enough to do 2 colors.
He has tried to get out of every chore he normally does. I was understanding the first few days, but now I am not. He still has a perfectly good left hand with which he can empty the dishwasher with. I spared him from loading (God knows that we don’t need a wet and food covered cast to help speed along the smell that will start to come from within shortly), sweeping the floor and taking out the trash.
I have also rewarded him with lots of baked goods lately, including this awesome bread from Gluten-Free in the Country. This is an All Purpose Quick Bread and man, was it good! The kids loved it, as did I. It has stayed wonderfully at room temperature on my counter since Tuesday. Jon has eaten pulled pork sandwiches on it, PB & J and butter. Here are some pics of the bread:
All Purpose Quick Bread **Recipe Courtesy of Gluten Free in the Country
First mix:
4 eggs
1/4 cup sugar
2/3 cups mayonnaise
3/4 cup milk
2 teaspoon vanilla extract
Then add:
1 1/4 cups rice flour
1/4 cup sorghum
3/4 cup tapioca starch
1 teaspoon salt
1 teaspoon baking soda
3 teaspoons baking powder
1 teaspoon xanthan gum
Mix well for about one minute. Pour into greased loaf pan (batter will be more like cake batter).
Bake in a preheated oven at 350 degrees for 45-50 minutes.
Pumpkin Cookies
One of my favorite parts about fall is pumpkin. I have mentioned that before many times. Since I have been in the baking mood, I made pumpkin cookies the other day. This recipe comes from my Grandmother on my Dad’s side of the family. Sadly she passed away several years ago. Another reason I like this recipe so much is that it reminds me of her and all the times that she made them for us when we were kids.
Before baking:
After baking:
Frosted and ready to eat:
The recipe has been modified to be gluten-free. The icing can be made with or without the cinnamon. I personally like it with and that is how I made it for these cookies.
Pumpkin Cookies
1 cup sugar
½ cup shortening
2 eggs (beaten)
1 cup pumpkin (not pie mix)
1 ½ cups flour (I used rice, potato starch & tapioca mix that had guar gum in it; make sure to add 1.5 tsp. xanthan gum if your mix doesn’t have it)
1 tsp cinnamon
4 tsp baking powder (not a typo, these puppies get fluffy!)
¼ tsp salt
1 tsp vanilla
First mix sugar & shortening. Then add everything else. Spoon onto greased baking sheet. Bake at 375 for 10-12 minutes. Cool slightly and then transfer to baking rack. Tip: Place wax paper or parchment paper under your cooling rack so when you frost/ice the cookies you don’t make a disaster zone like I usually do. My husband, Aaron, always reminds me that I forgot the wax paper after the fact. Thanks, honey!
2 – 2 ½ dozen cookies (may need to double the recipe if you want more, this is a true count)
Icing – (let cookies cool before icing)
2 cups powdered sugar
1 tbsp milk (may need more)
1 tsp vanilla
Try ½ tsp cinnamon in the icing…YUM!
Enjoy!
Stress = Baking/Cooking
When I am stressed out, I bake or cook. So, watch for lots of baked goods this week. Today was a rough day. Found out that Jon’s wrist (navicular bone) is chipped/fractured. The dr from the urgent care called me back this afternoon and told me that the radiologist read the x-ray and called back right after we left last night. We have an appointment for Jon to see the orthopedic doctor on Wednesday morning.
This morning I wanted to make my little, injured man feel better, so what better way than GF Cinnamon Rolls?? I used the Chebe Cinnamon Roll Up Mix and made the recipe using the method for the almond sticky buns on the back. I subbed walnuts for almonds though. They turned out wonderfully and it took Jon’s mind off his pain for a bit. 🙂 Here is a picture (not that great b/c it was still dark out):
They are darker in color than typical cinnamon rolls for a couple of reasons. One, the mix has cinnamon in it. Second, the mix calls for applesauce (hey, didn’t I just make a bunch of that??) and my homemade applesauce is darker in color b/c of the brown sugar/cinnamon/nutmeg mixture I season it with.
Chebe Cinnamon Walnut Sticky Rolls
1 package Chebe Cinnamon Roll Ups
1/2 cup brown sugar
1/2 cup chopped walnuts
Butter and/or Pam
9 inch pie pan or cake pan
1. Make mix according to directions.
2. Roll out into a rectangle.
3. Grease pan with butter or Pam.
4. Sprinkle 1/4 cup brown sugar and 1/4 cup walnuts over the bottom of the greased pan.
5. Spray dough with Pam or spread with butter and sprinkle remaining 1/4 cup brown sugar and 1/4 cup walnuts over the rolled out dough.
6. Roll up into a log-like roll.
7. Slice in 1/2 inch slices and place swirl side down in pan.
8. Bake at 350 for 10-14 minutes, checking frequently.
9. Cool slightly, then invert onto a plate.
10. Enjoy!
One recipe down, one or 2 more to go for the day. I had to do something to keep my mind (and my fingers off the lap top) off of Jon’s injury.
I set off next on a marathon applesauce making event. I made a small batch the other day, today, I filled that 4.5 qt. crock pot to the rim! I peeled, cored and cut up 22 apples. YIKES! Not only did I want to freeze some, but I need some for upcoming recipes this week (applesauce cake and applesauce cookies). Here are some pics of my stuffed crock pot:
Apples before:
In the pot, ready to slow cook:
I started them at 10:30 AM and just packaged up my containers at 8:30 PM. Boy did it smell good in here!
It Was Bound to Happen
Both of my children have been extremely lucky in the broken bones department, especially considering that Jon plays ice hockey and has since he was 4. Well, that streak of luck has possibly come to an end. Jon was playing football in the neighbor’s yard this evening and came inside saying that he thought the might have broken his arm. Oh good Lord! I glanced at the clock and noticed that it was 7:40 PM. The Children’s Close To Home Urgent Care Center closes at 8:00 PM on the weekends, so off we ran. I drove as fast (and as safe) as I was legally allowed to. We got in right away. Several X-Rays and probings later, the doctor had his right arm wrapped up in a splint. They weren’t quite sure whether or not anything is broken. There is a questionable spot in his wrist that if that bone is damaged (can’t remember what it is called), it won’t fuse properly as he grows and then he won’t be able to do things involving thumb movemet, like play the piano, text message, play video games, etc. So erring on the conservative side, they treat it like it is broken. I have to call his Ped. in the AM and get a referral to the orthopedist. He needs to see the orthopedist in the next 3 – 5 days or sooner if things get worse. He can’t take the splint off until the ortho sees him. Poor kid! He is right-handed, so school should be entertaining for him this week. I need to remember to email his teachers so they are aware of his situation and see what he can do to make things easier this week.
The really bad part of all of this (not that a broken arm isn’t bad enough), hockey evaluations start in a week. This could push back his hockey season or eliminate it all together, depending on what the ortho says.
On a positive note, I have never been in and out of that Urgent Care so quickly!! Maybe walking (running) in 10 minutes before they closed, and probably being the only patient in there, motivated them to get us out quickly! LOL!
Menu Plan Monday ~ September 22, 2008
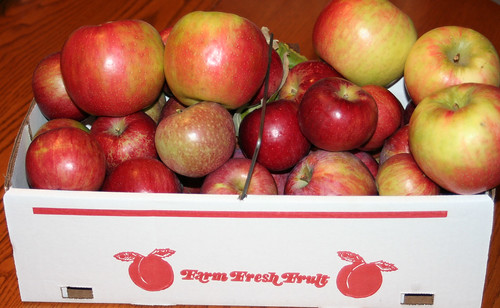
We are in full fall mode here in Central Ohio. I am so excited. I have so many fall recipes planned, I can’t wait! Some will be this week, some over the next few weeks. I am going on a fall baking extravaganza this week, I am sure that my husband is going to wonder if I am opening a bakery on the sly! 😉 I am making more applesauce tomorrow, a whole crock pot worth, for use in some of my baked goods. 🙂
The menu plan this week is based on some of the family favorites in our house.
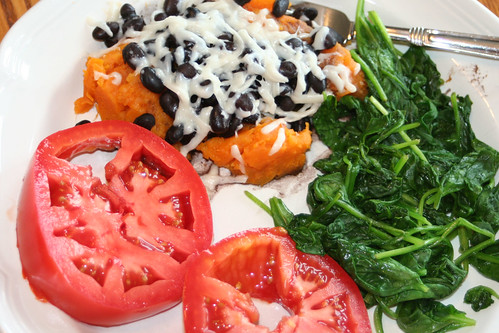
Sunday ~ Burgers on Chebe Homemade Buns, homemade sweet potato fries (see recipe below), broccoli and okra zuchinni medley (see recipe below).
Monday ~ Grilled Salmon, steamed brown jasmine rice, green beans and spinach salad
Tuesday ~ Garlic Pork Roast (family favorite), mashed garlic potatoes, steamed broccoli, salad and homemade biscuits (will post recipe later in the week for these with a picture).
Wednesday ~ Dinner out, most likely Cheeseburger in Paradise
Thursday ~ BBQ baby back ribs (family favorite), baked potatoes, homemade corn bread (see recipe below) & salad.
Friday ~ Homemade pizza (family favorite; dough is Pamela’s Wheat Free or a new one I found from Gluten-Free Mommy that I want to try), steamed veggies and salad.
Saturday ~ I am going out for Sushi with my Mom. The kids will have leftovers with Aaron.
Baking that I have planned for the week:
Applesauce
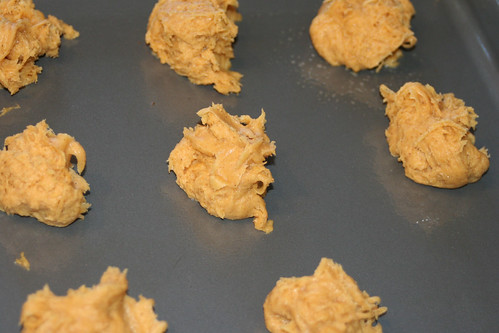
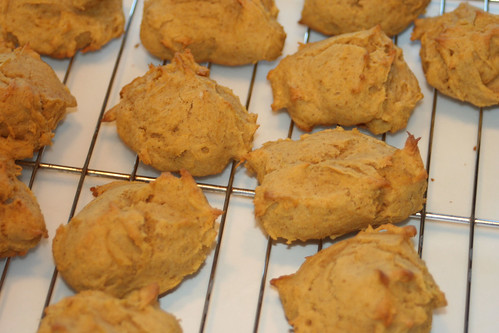
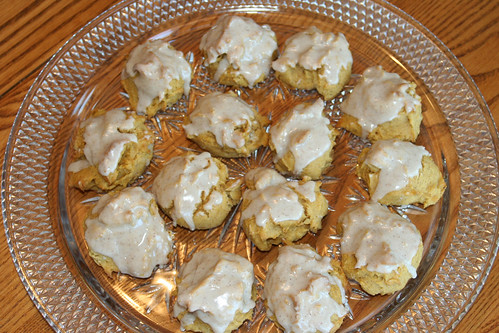
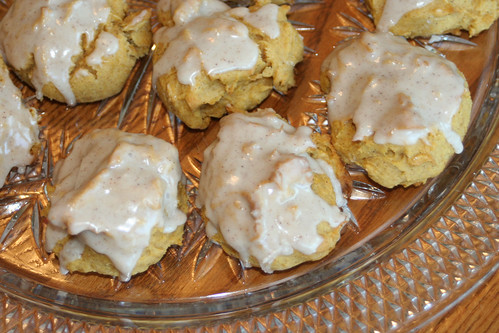
Iced Pumpkin Cookies
Applesauce Spice Cookies
Apple & Spice Muffins
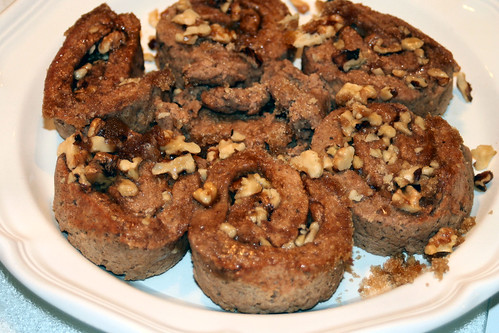
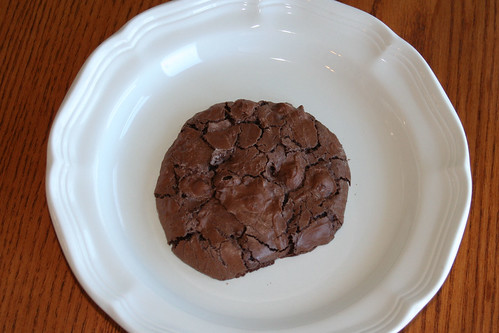
Chocolate Chewies
Pie In a Pumpkin
Recipes
Sweet Potato Fries
1 large sweet potato or yam
Pam
Sea salt
Nutmeg
1. Scrub and slice sweet potato/yam into fry shapes. I left the peel on, you can peel it if you like.
2. Preheat oven to 400 degrees. Pam your baking sheet.
3. Place potatoes on baking sheet in a single layer. Spray with Pam. Sprinkle with sea salt and lightly with nutmeg.
4. Bake at 400 for 15-20 minutes. Check on fries. Flip them over and bake for another 15 or so minutes. If they aren’t done yet, turn temp up to 425 and keep a close eye on them. If you want to crisp up the outside, broil for the last few minutes.
This made enough for 2 people.
Okra Medley
Yield
4 servings (serving size: 1/2 cup)
Ingredients
· 1 small zucchini and 1 small yellow squash
· Cooking spray
· 1 1/2 cups sliced fresh okra
· 2 tablespoons chopped onion (I omitted this b/c I can’t eat onion)
· 1 cup chopped tomato
· 1/8 teaspoon dried basil (I used fresh)
· 1/8 teaspoon dried thyme (I omitted this)
· Dash of freshly ground black pepper
Preparation
Cut zucchini in half lengthwise; cut into 1/4-inch-thick slices.
Heat a nonstick skillet coated with cooking spray over medium-high heat. Add zucchini, okra, and onion; sauté 4 minutes. Stir in tomato and remaining ingredients. Cover and cook over low heat 5 minutes or until thoroughly heated, stirring frequently.
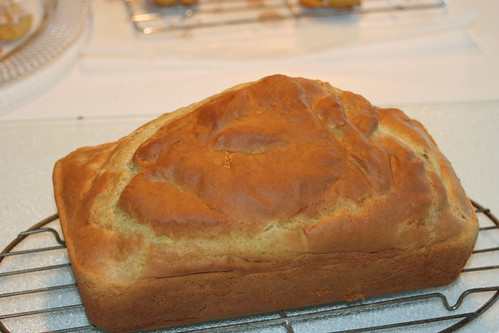
Corn Bread
**From the back of the Quaker Yellow Corn Meal Box
1 ¼ cups Pamela’s Baking Mix
¾ cup cornmeal
¼ cup sugar
2 tsp baking powder
½ tsp salt (I omitted this b/c there is salt in Pamela’s baking mix)
1 cup buttermilk (the box says to use skim, I like buttermilk in my cornbread)
¼ cup vegetable oil (I use canola)
2 egg whites or 1 egg beaten (I used the beaten egg).
Heat oven to 400. Pam 8 or 9 inch baking pan. Combine dry ingredients. Stir in milk, oil and egg, mixing just until dry ingredients are moistened. Pour into pan. Bake 20 to 25 minutes or until golden brown and toothpick comes out clean. (I did 20 minutes). Serve warm.
**You can make these into muffins. Bake for 15-20 minutes at 400. Makes 12 muffins.
BBQ Baby Back Ribs
2 racks of baby back ribs
1 – 1.5 bottles of Sweet Baby Ray’s BBQ sauce (all flavors are GF)
Pam
1. Preheat oven to 350.
2. Pam large (lasagna size) baking dish
3. Cut racks of ribs in half (so they all fit, single layers, in the baking dish).
4. Coat both sides with sauce and place in baking dish. Don’t skimp on the sauce.
5. Cover tightly (like twice) with foil.
6. Bake for 2 hours.
7. Let cool slightly on the counter. Either put in fridge or heat up the grill to finish off.
8. About 20 minutes before you want to eat, heat up the grill.
9. Place ribs on grill and brush both sides with sauce.
10. Grill until they start to brown up on both sides.
11. Enjoy!
Make sure to check out Cooking & UNcooking for lots more GF Menu Plans. Thanks for hosting!
Also, for more menu plans, check out Org Junkie.
Fall Has Fallen
Fall has fallen. Is that a saying? When it becomes Spring, you hear people saying “Spring Has Sprung” all over. Whether it is a saying or not (which we all know it isn’t 😉 ), I feel as if it has. The air is crisp and cool in the mornings and then it warms up to the mid – high 70s in the afternoon. The perfect weather. The perfect season. The skies are clear blue, no clouds in sight. Ahhhh…… So when my MIL asked yesterday if I wanted to go pick apples with her and Hannah, of course I jumped at the opportunity. What a “fally” thing to do! I love the pumkin patch, but I have never done the apple orchard before. I could barely contain myself for the next 24 hours.
We headed out around 9:30 this morning. We had plans on going to Lynd’s Fruit Farm, but ended up somewhere else that was much closer. It was also called Lynd’s, but apparently is owned by the brother of the guy who owns the one we intended on going to. I don’t care, I got to pick apples! We picked Winesap, Jonathan and Cortland apples. We also purchased some Honey Crisp inside, but weren’t able to pick those. They were delicious!! Very crisp (like their name) and sweet! I also came home with some Cashew Brittle….oh boy…..that stuff is GOOD!! It has 3 ingredients: Butter, Sugar & Cashews. You can bet that I will be making some of this for Christmas this year. Hannah had a blast picking apples with Grandma and I had fun picking and taking pictures.
Hannah went back to Grandma’s to make caramel apples and I came home to make some applesauce. I had seen that Stephanie over at A Year of Crockpotting had made crock pot applesauce earlier in the week and that inspired me to make mine that way too. I modified her recipe to be close to what my Grandma makes. Here is the recipe that I ended up using:
Crock Pot Applesauce
**Inspired by Stephanie at A Year of Crock Potting
8 med-large apples
6 TBSP lemon juice or the juice of 2 lemons
½ cup water
¼ cup brown sugar
1 tsp cinnamon
¼ tsp nutmeg
1. Peel & core apples. Slice into quarters.
2. Place in crockpot and add lemon juice & water; toss apples with this mixture, it will keep
the apples from turning brown.
3. Add remaining ingredients and cook on low for 6-8 hours. (I ended up only doing 5 hours)
4. Stir and apples will basically fall apart. If you want it really smooth, you may need to put it
in a blender, but I think even a fork may work.
I didn’t get any pictures of it when it was finished b/c I gave some to my neighbor (she was giggling when she found out I was making applesauce from scratch; she asked why I would do that when I could buy it at the store??? LOL). I put the rest in some small containers in the fridge. This probably serves 6-8. If you want more, like I do, double or triple the recipe. I used a 4 qt crock pot and had plenty of room for more. I plan on making a significant amount over the next week now that I know the spices are right where I want them.
Here are some pictures of the apples that I still have left:
Some pictures of Hannah & Grandma picking apples:
It was a beautiful way to kick off the fall season. On tap this coming week, more applesauce, apple crisp and maybe some Sour Cream Apple Cake, recipe by Karina from Karina’s Kitchen.
Comfort Food
A few weeks ago I found out that I needed to have a tooth pulled. Blah! I had a crown come loose and the root underneath was cracked & split. I had my appointment scheduled for this morning and it went very smoothly. The oral surgeon was great and even hooked me up with some Vicodin for the pain! Yeah! LOL! So tonight’s menu and tomorrow was all about comfort food. Food that I didn’t have to put much effort into chewing and to just make me feel good. For the main course I made homemade Macaroni & Cheese. I used a recipe from Betty Crocker’s Cookbook with some modifications. It came out wonderful! The kids weren’t super crazy about it, but they are used to Velveeta or Kraft Mac & Cheese. Here are some pictures:
With Bush’s Baked Beans, topped with some grape tomatoes:
Baked Macaroni & Cheese
2.5 – 3 cups uncooked pasta (I used Trader Joe’s)
¼ cup butter
¼ cup GF flour (I used sorghum)
½ tsp salt
¼ tsp pepper
¼ tsp ground mustard
¼ tsp Worcestershire sauce (Lea & Perrin’s is GF)
2 cups milk
2 – 4 cups shredded cheddar cheese (8 – 16 ounces, depending on how cheesy you want your macaroni & cheese; I use 2% milk fat cheese from Kraft)
Bread Crumbs
1. Heat oven to 375 degrees.
2. Cook macaroni as directed on package.
3. While macaroni is cooking, melt butter in 3-quart saucepan over low heat. Stir in flour, salt, pepper, mustard and Worcestershire sauce. Cook over low heat, stirring constantly, until mixture is smooth and bubbly. Remove from heat; Stir in Milk. Heat to boiling, stirring constantly. Boil and stir 1 minute. Stir in cheese. Cook, stirring occasionally, until cheese is melted.
4. Drain Macaroni. Gently stir macaroni into cheese sauce. Pour into greased (I use Pam) 2-quart casserole. Top with breadcrumbs and spray top with Pam. Bake uncovered for 20 – 30 minutes or until bubbly.
Serves 5 (1 cup servings). Calories: 463 if you use 2 cups of cheese; 595 if you use 4 cups of cheese.
For dessert we had an amazingly wonderful chocolate treat. A friend from a forum that I frequent posted this recipe this afternoon and I knew I had to try it. Not only was it chocolate, my fav, but it screamed “comfort food” to me. The recipe is called “Dangerous Chocolate Cake In-A-Mug”.
Some pics of it in the mug still:
On a plate with some Edy’s Slow Churned Vanilla Bean Ice Cream
Delectable, scrumptious, all of the above.
Dangerous Chocolate Cake In-A-Mug**Recipe Courtesy of Courtney (Aug 02 Playgroup)
1 coffee mug
4 Tbsp. flour (I used a GF mix of rice, potato & tapioca; no xanthan gum)
4 Tbsp. Sugar (I lowered this to 3 TBSP)
2 Tbsp. Cocoa
1 egg
3 Tbsp. Milk
3 Tbsp. Oil
Small splash of vanilla
3 Tbsp. Chocolate chips, necessary 🙂
Add dry ingredients to mug, mix well with a fork.
Add egg, mix thoroughly.
Pour in milk and oil and vanilla, mix well.
Add chips, if using.
Put mug in microwave, and cook for three minutes on 1000 watts.
Cake will rise over top of mug–do not be alarmed!
Allow to cool a little; tip onto a plate if desired.
Eat!
Chocolate Chewies
No, I don’t have a recipe for these. Yes, I wish that I did. Wow. That is all I really have to say. Are these cookies good b/c they are chocolate? Maybe. Chocolate is one of my favorite foods (okay, you caught me, it is my favorite). Are they good b/c they are chewy? Maybe. Maybe it is the combination of the chocolate, crunchy outside and chewy inside that does it. It is like heaven on your tongue. So comforting and soothing. I picked up these babies at Whole Paycheck, oh, I mean Whole Foods, yesterday. I saw them last time I was there, but already had some cookies/cake at home to work on. Then someone on the Yahoo Silly Yaks group mentioned them and I remembered that I really, really wanted to give them a try. I made a point to stop in and grab some the next time I was in the area. They are $4.99/pound and totally worth every. single. penny. The ingredients are simple: powdered sugar, chocolate chips, egg whites, cocoa powder and sea salt.
Here is a picture of the yummy goodness:
So, if any cooking wizards know how to make these, please, share. 🙂 Not that I can’t keep buying them, b/c I will, but I like to bake, so it would be nice to make them at home too.
UPDATE:
I have found a recipe online for Chocolate Chewies, actually called Carlton’s Chocolate Chewies. This looks like it very well could be the recipe. This one calls for pecans, but you could leave those out as noted at the end and just use the chocolate chips. It also has vanilla, which couldnt’ hurt. I hope to try to make these this weekend or early next week. Here is the recipe:
Carlton’s Chocolate Chewies
{ Yield: About 4 dozen cookies }
2 cups whole pecans
3 large egg whites
2-1⁄4 cups powdered sugar
6 tablespoons good-quality unsweetened cocoa powder
Pinch of kosher salt
1⁄2 teaspoon vanilla extract
Preheat the oven to 350°F. Arrange the pecans on a rimmed baking sheet in a single layer and toast them for 7 to 9 minutes, until darker in color and aromatic. Remove from the oven, transfer to a bowl, let cool, and coarsely chop.
Reduce the oven temperature to 300°F. Line baking sheets with parchment paper or silicone mats.
In a large bowl, briskly whisk the egg whites until foamy, about 30 seconds. Stir in the powdered sugar, cocoa, salt, vanilla, and pecans. Using a 1-inch-diameter scoop, drop spoonfuls of dough 11⁄2 inches apart on the prepared pans. Bake for 8 to 10 minutes, until set and shiny, with zigzag cracks on top. Remove from the oven and let cool on the pans for 5 to 10 minutes. Using a metal spatula, transfer the cookies to wire racks to cool completely. The cookies will keep for up to 1 week in an airtight container or 3 weeks tightly wrapped and frozen.
Rather sweet variation
This cookie is amazingly adaptable and can handle up to two additional ingredients. I have tried numerous add-ins. My favorites are 1 cup quartered dried cherries, 1 cup sweetened shredded coconut, and 1 cup semisweet chocolate chips. Nut haters can leave out the pecans, substitute one or two of the add-ins, and make the cookies as directed above.
tip: To skip the hassle of separating egg whites from yolks, especially if you have no plans to use the leftover yolks, look in the dairy case of your local natural foods store for small containers of pure egg whites. One egg white equals about 1⁄8 cup. Do not use egg substitute, which is formulated with added fat to simulate an egg without cholesterol.
I will share my results once I have baked them. 🙂
